Python Tkinter는 Python에서 그래픽 사용자 인터페이스(GUI)를 사용하여 채팅 응용 프로그램을 구축하는 방법을 살펴봅니다. 이 자습서를 따라 기능 및 대화형 채팅 인터페이스를 만드는 데 필요한 기본 개념과 기술을 배우게 됩니다.
전제 조건
이 튜토리얼을 따라하려면 Python 프로그래밍과 Tkinter 라이브러리에 대한 기본적인 이해가 있어야 합니다. 시스템에 Python이 설치되어 있는지 확인하십시오. Tkinter가 미리 설치되어 있으므로 가급적 Python 3.x를 설치하십시오.
1단계: GUI 설정
첫 번째 단계는 채팅 애플리케이션의 그래픽 사용자 인터페이스를 설정하는 것입니다. 기본 창, 채팅 메시지를 표시하는 텍스트 영역, 메시지 입력을 위한 입력 필드 및 보내기 버튼을 만듭니다.
import tkinter as tk

window = tk.Tk()
window.title("Chat Application")

# Create the chat display area
chat_display = tk.Text(window, height=20, width=50)
chat_display.pack()

# Create the message input field
message_input = tk.Entry(window, width=40)
message_input.pack()

# Create the send button
send_button = tk.Button(window, text="Send")
send_button.pack()

window.mainloop()
2단계: 채팅 기능 구현
다음으로 채팅 메시지 전송 및 표시를 처리하는 데 필요한 기능을 추가합니다. 보내기 버튼을 클릭하면 호출되는 함수를 만들고 입력 필드에서 메시지를 검색하여 채팅 표시 영역에 추가하고 입력 필드를 지웁니다.
def send_message():
    message = message_input.get()
    if message:
        chat_display.insert(tk.END, f"You: {message}\\\\n")
        message_input.delete(0, tk.END)

send_button.config(command=send_message)
3단계: 네트워킹 통합
채팅 애플리케이션이 작동하려면 네트워킹 기능을 통합해야 합니다. 기본 클라이언트-서버 연결을 설정하기 위해 socket 모듈을 사용할 것입니다.
import socket

# Set up the networking
HOST = "localhost"  # Replace with the server IP address
PORT = 22  # Replace with the desired port number

# Create a socket object
client_socket = socket.socket(socket.AF_INET, socket.SOCK_STREAM)

# Connect to the server
client_socket.connect((HOST, PORT))
4단계: 메시지 보내기 및 받기
이제 클라이언트 소켓을 사용하여 서버에 메시지를 보내도록 send_message() 함수를 수정해 보겠습니다. 또한 서버에서 지속적으로 메시지를 수신하고 채팅 표시 영역에 표시하기 위해 별도의 스레드를 생성합니다.
import threading

def send_message():
    message = message_input.get()
    if message:
        chat_display.insert(tk.END, f"You: {message}\\\\n")
        message_input.delete(0, tk.END)
        client_socket.send(message.encode())

def receive_messages():
    while True:
        message = client_socket.recv(1024).decode()
        if message:
            chat_display.insert(tk.END, f"Server: {message}\\\\n")

receive_thread = threading.Thread(target=receive_messages)
receive_thread.start()
5단계: 연결 닫기
마지막으로 사용자가 채팅 애플리케이션을 닫을 때 정리 프로세스를 처리해야 합니다. 창이 닫힐 때 호출되는 함수를 추가하고 클라이언트 소켓을 닫고 수신 스레드를 종료합니다.
def close_window():
    client_socket.close()
    window.destroy()

window.protocol("WM_DELETE_WINDOW", close_window)
전체코드
|
1
2
3
4
5
6
7
8
9
10
11
12
13
14
15
16
17
18
19
20
21
22
23
24
25
26
27
28
29
30
31
32
33
34
35
36
37
38
39
40
41
42
43
44
45
46
47
48
49
50
51
52
|
import tkinter as tk
import socket
import threading
def send_message():
message = message_input.get()
if message:
chat_display.insert(tk.END, f"You: {message}\n")
message_input.delete(0, tk.END)
client_socket.send(message.encode())
def receive_messages():
while True:
message = client_socket.recv(1024).decode()
if message:
chat_display.insert(tk.END, f"Server: {message}\n")
def close_window():
client_socket.close()
window.destroy()
# Set up the networking
HOST = "localhost" # Replace with the server IP address
PORT = 22 # Replace with the desired port number
# Create a socket object
client_socket = socket.socket(socket.AF_INET, socket.SOCK_STREAM)
# Connect to the server
client_socket.connect((HOST, PORT))
# Create the GUI
window = tk.Tk()
window.title("Chat Application")
chat_display = tk.Text(window, height=20, width=50)
chat_display.pack()
message_input = tk.Entry(window, width=40)
message_input.pack()
send_button = tk.Button(window, text="Send", command=send_message)
send_button.pack()
window.protocol("WM_DELETE_WINDOW", close_window)
# Start receiving messages in a separate thread
receive_thread = threading.Thread(target=receive_messages)
receive_thread.start()
window.mainloop()
|
cs |
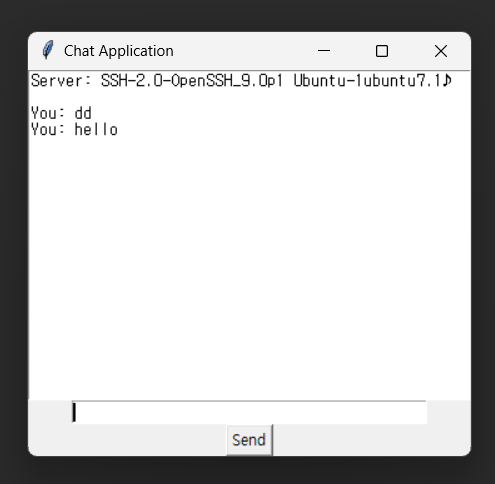
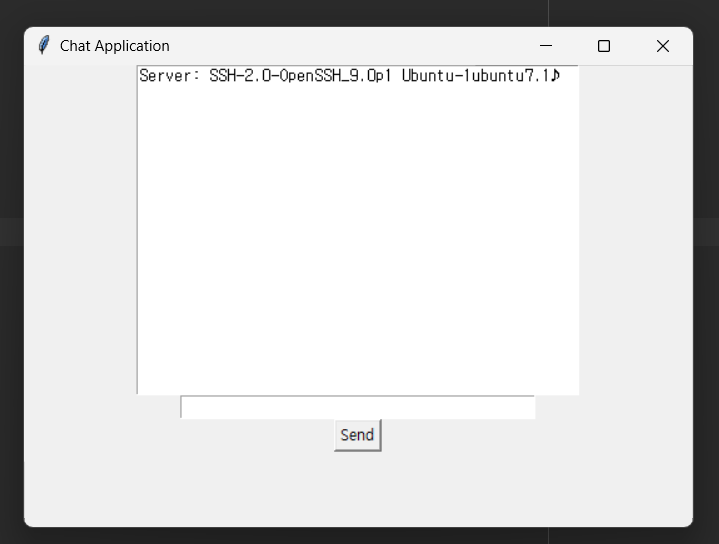
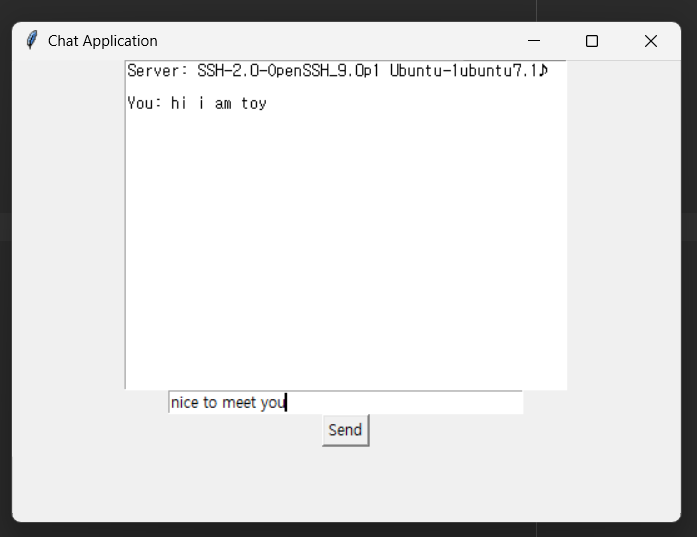
실행화면
결론 및 의견
Python Tkinter를 사용하여 채팅 프로그램을 성공적으로 구축했습니다. 이 튜토리얼 전체에서 GUI 설정, 채팅 기능 구현, 네트워킹 통합, 메시지 송수신, 연결 닫기 처리를 포함한 필수 단계를 다루었습니다.
사용자 인증, 메시지 암호화 또는 추가 기능을 추가하는 등 필요에 따라 응용 프로그램을 자유롭게 사용자 정의하고 향상시킬 수 있습니다. sshd서버가 구축된 서버로 접속가능합니다. (도메인 주소 + 22포트)
이 채팅 응용 프로그램은 기본 구현을 나타내며 고급 응용 프로그램의 시작점 역할을 합니다. Tkinter 및 네트워킹 개념을 탐색하고 실험하면 앞으로 더 정교하고 기능이 풍부한 채팅 응용 프로그램을 만들 수 있습니다.
[관련글]
2023.06.11 - [파이썬 (pythoon)] - PyQt QWebEngineView 웹 브라우저 만들기
PyQt QWebEngineView 웹 브라우저 만들기
QWebEngineView는 PyQt 활용을 통해 파이썬 언어를 Qt toolkit을 사용할 수 있도록 하는 모듈입니다. Qt toolkit을 사용하면 GUI 애플리케이션을 만들 수 있습니다. 이번에는 PyQt QWebEngineView 웹 브라우저 만들
2toy.net
2023.06.13 - [분류 전체보기] - 파이썬 Tkinter 대화 상자(Dialogs), 파일 대화 상자(File Dialogs) 사용법
파이썬 Tkinter 대화 상자(Dialogs), 파일 대화 상자(File Dialogs) 사용법
Tkinter를 사용하면 다양한 다이얼로그(Dialogs)와 파일 파일열기창(File Dialogs)를 만들 수 있습니다. 이 글에서는 Tkinter의 대화 상자(Dialogs)와 파일 대화 상자(File Dialogs)를 사용하는 방법을 소개하고,
2toy.net
2023.05.20 - [파이썬 (pythoon)] - python requests 정리 및 네이버 뉴스 크롤링 예제
python requests 정리 및 네이버 뉴스 크롤링 예제
Python은 인터넷에서 정보를 가져오기 위한 다양한 패키지들을 제공하고 있습니다. 이 중에서 requests 라이브러리는 HTTP 요청을 보내고 받을 수 있는 기능을 제공하여 웹 크롤링, API 호출 및 웹 서
2toy.net
2023.05.03 - [파이썬 (pythoon)] - 파이썬 독학 과연 가능할까?
파이썬 독학 과연 가능할까?
많은 프로그래밍 언어 중 파이썬은 정말 매력적이라고 생각합니다. 저도 처음 파이썬 독학, 공부를 시작할때 너무 설레였던거 같습니다. 막연히 매크로를 사용해서 업무를 편하게 하고 싶다는
2toy.net
'파이썬 (pythoon)' 카테고리의 다른 글
| Python Tkinter를 이용한 텍스트 편집기(Text Editor) 만들기 (0) | 2023.06.14 |
|---|---|
| Python Tkinter 메세지박스 (0) | 2023.06.14 |
| Python Tkinter ToolTip (툴팁) 만들기 (0) | 2023.06.13 |
| 파이썬 Tkinter에서 프레임(Frame) 활용하기 (0) | 2023.06.13 |
| SQL 자격증 중요성 및 유형, 과정, 시험 구성 (0) | 2023.06.12 |